
Getting set up for a New Season
Start your season off right by making sure your participant, staff and team lists are all up to date and ready to start your event registrations. This page will guide you through exactly what you need to do. If you have any questions, or need any help, don't hesitate to reach out at [email protected].
TASK 1
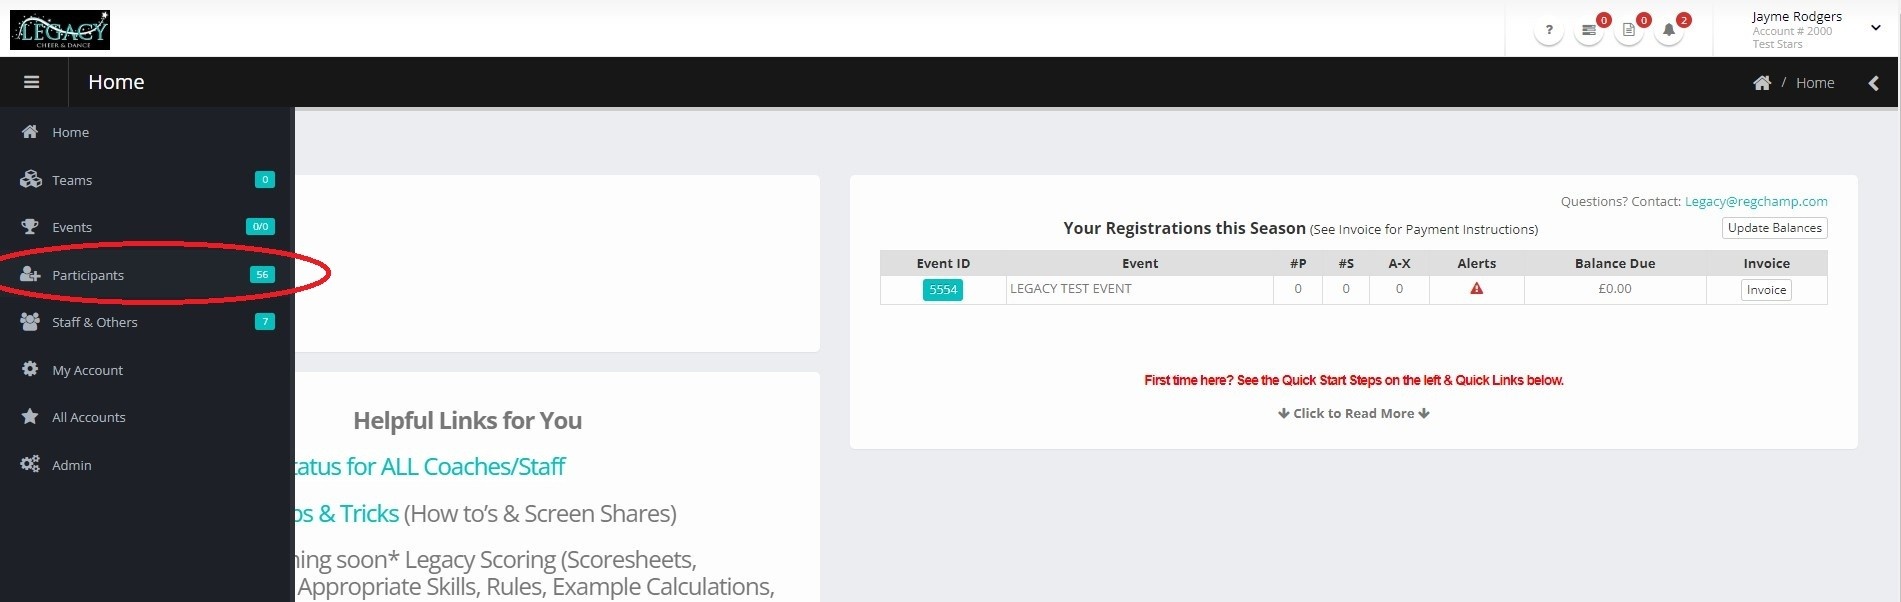
Hide or Delete any Athletes who are no longer with your programme for the new season:
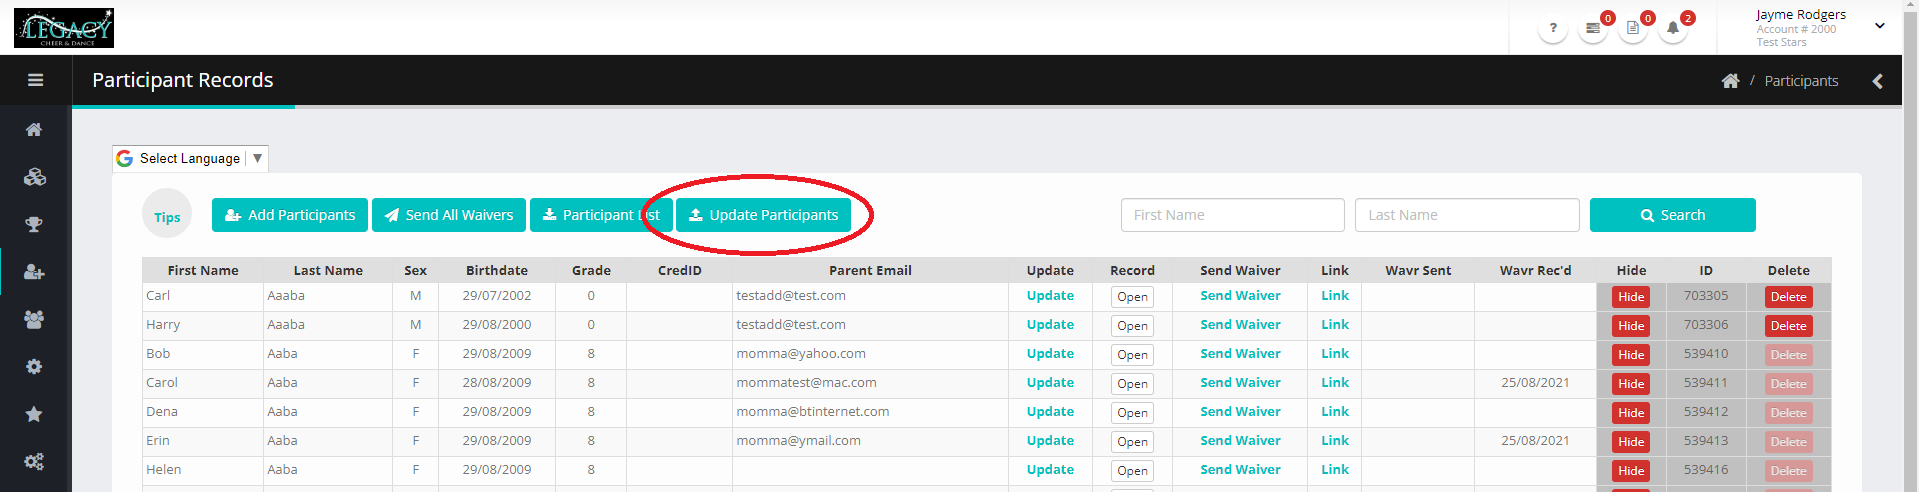
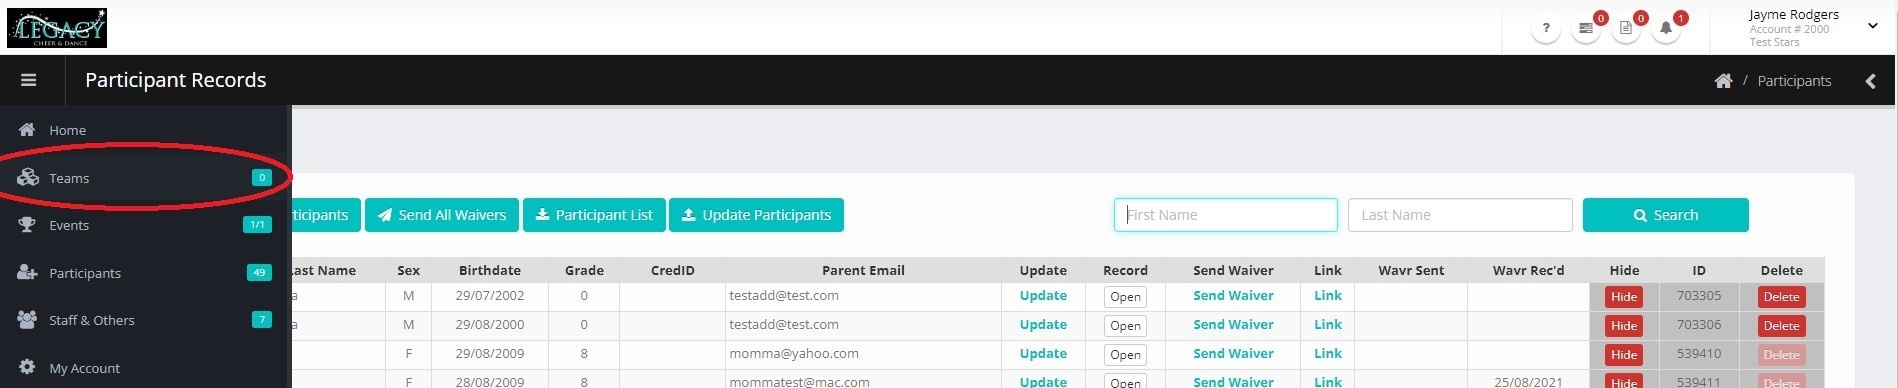
From the home screen, go to Participants in the left-hand menu:
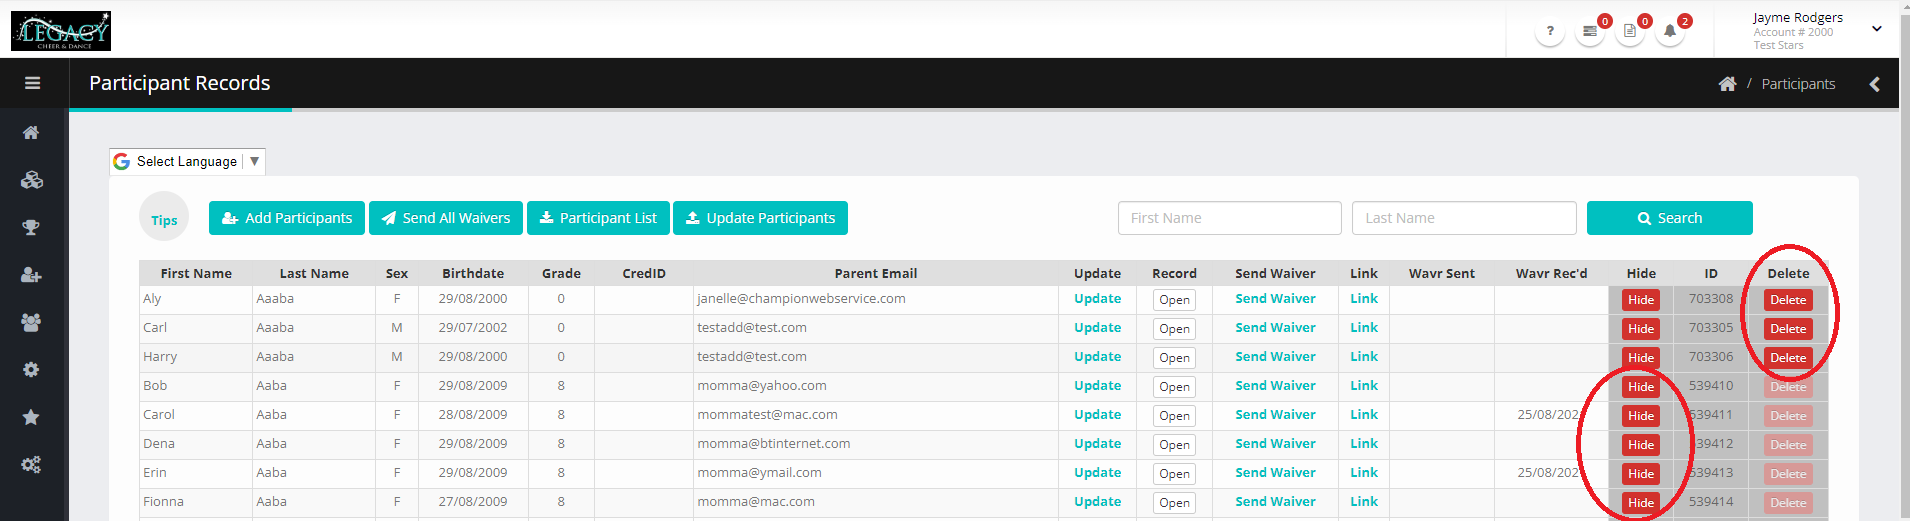
Athletes that have never been entered into an event in the past will be able to be Deleted, whereas those that were entered into events can only be Hidden:
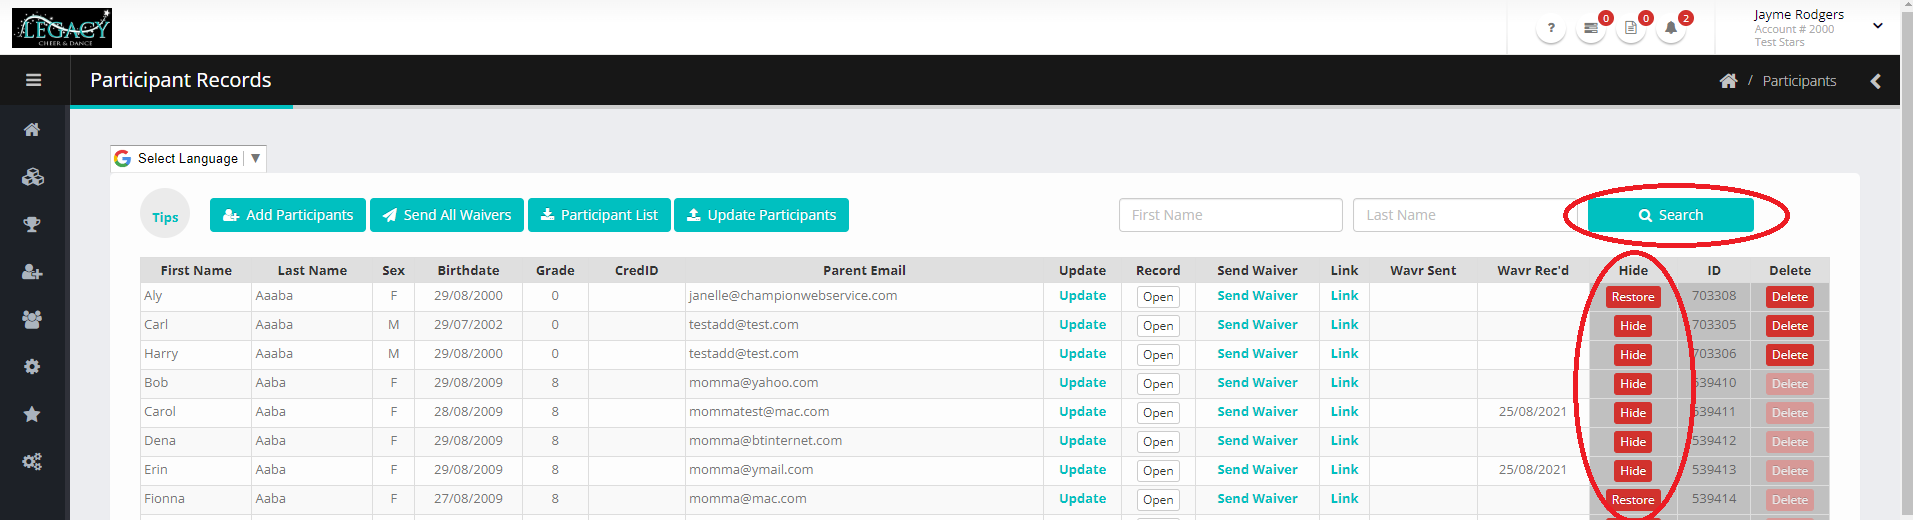
If you Hide someone accidentally, or to see any past athletes that may have been hidden, click on the SEARCH button to display all athletes – those that were hidden can be Restored. (Note that Deleted athletes cannot be restored):
TASK 2
Ensure details for existing athletes are up to date:
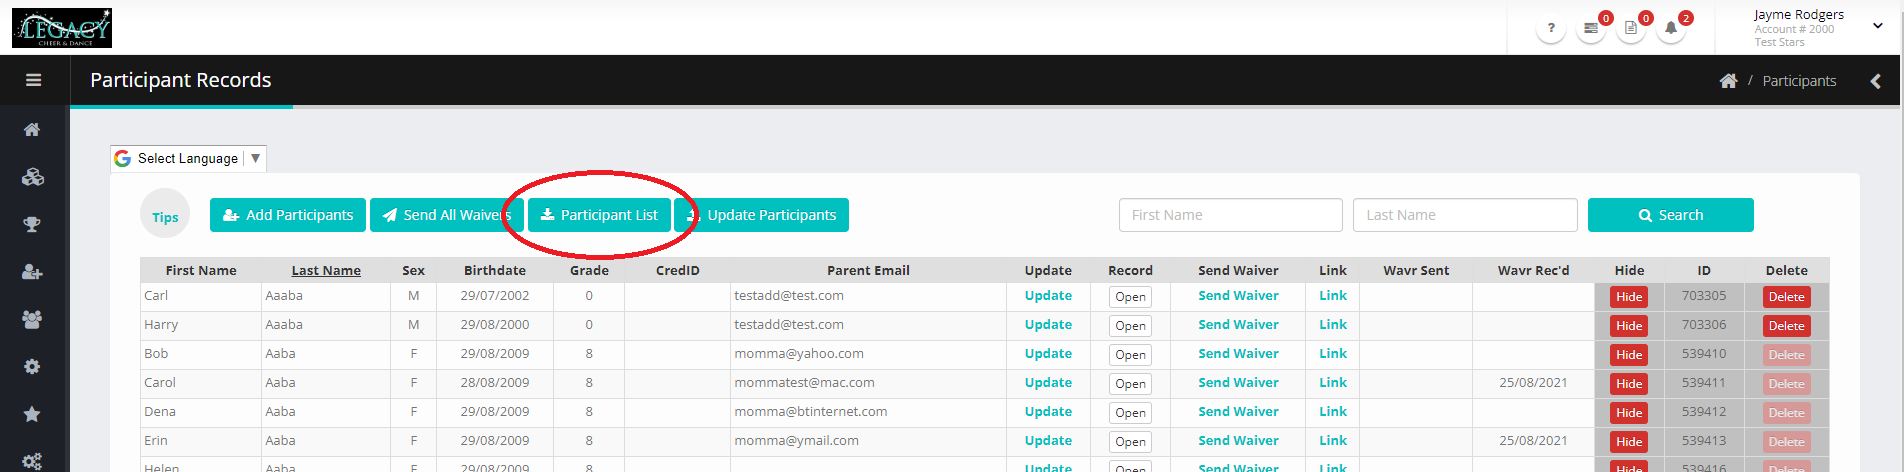
You can either view and update information manually for each athlete by clicking the ‘Update’ button on the Participants page.

Or you can download an excel spreadsheet of your existing Master Roster, make changes and then re-upload.

**Note that parent email is NOT required as we no longer require individual athlete waivers**
**NOTE that you cannot change athlete First Name, Last Name or Birthdate, via either method mentioned above. If you have athletes that need these details changed, please Delete or Hide the incorrect athlete record and create a new one.
TASK 3
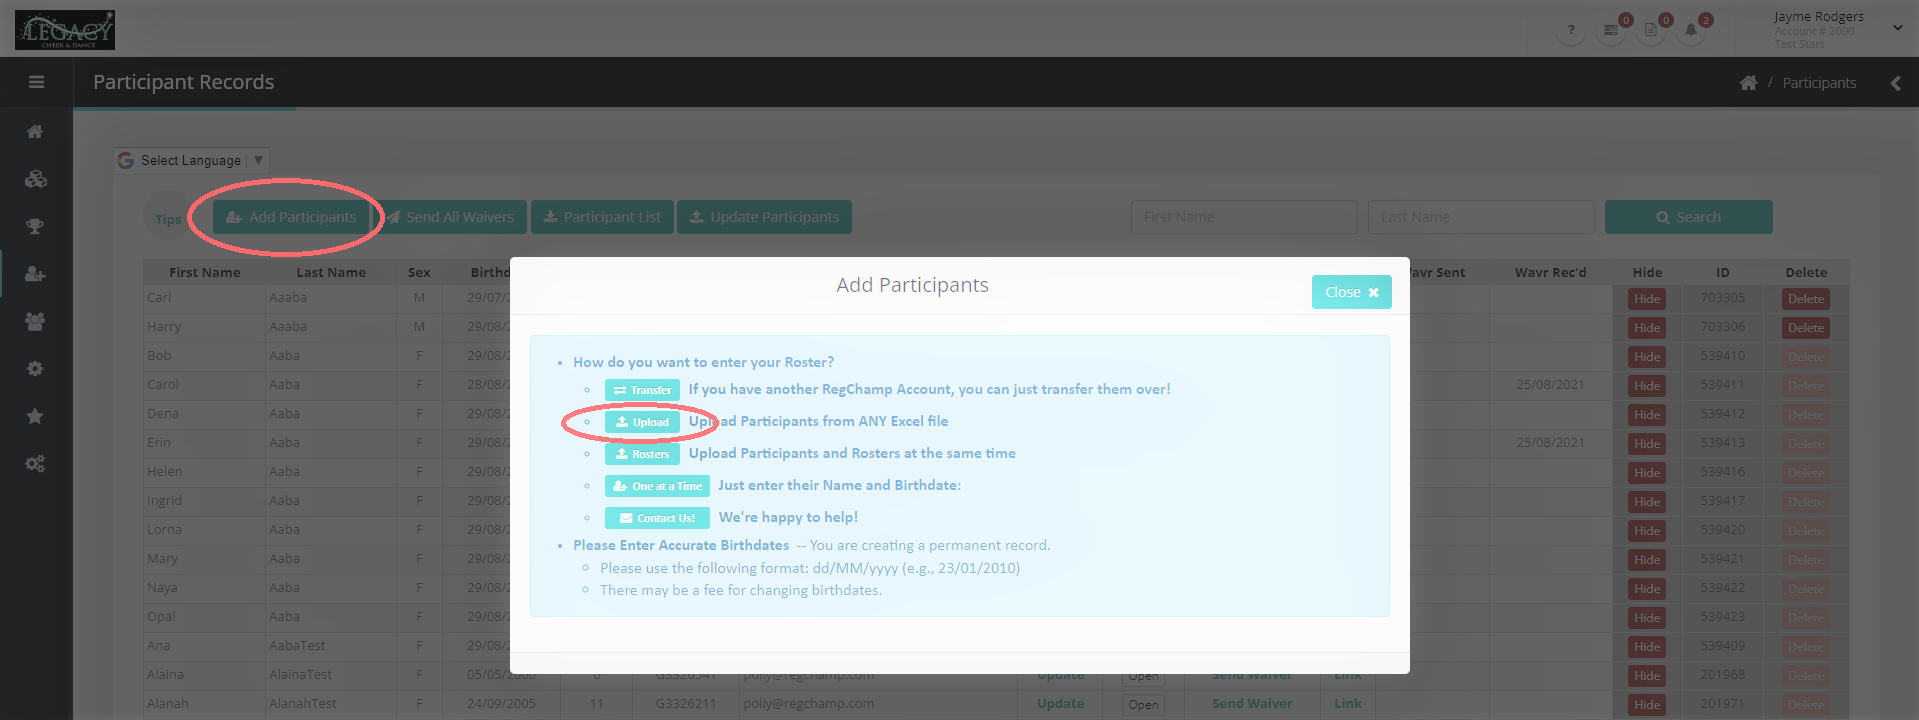
Add new athletes to your Master Participant List:
If you want to, you can also add your Teams at the same time – if you want to do this, please follow the instructions below for Adding Your Athletes to Teams.
To add just the athletes without the teams at this stage, you can use your own Excel spreadsheet and assign the columns accordingly. If you want to download a sample template from RegChamp, click here: https://regchamp.com/docs/Sample-Participants-CredC.xlsx. Use the two test entries as a guide but delete them those two rows before you upload the final document.
Follow the instructions to upload the Excel file, making sure to review the Tips and Guides provided by RegChamp – you can also see a more detailed instructional video, here.
IMPORTANT NOTES!
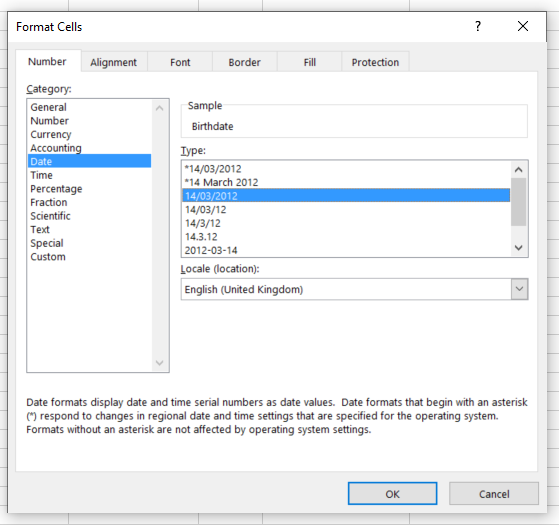
The Date of Birth field in the Excel spreadsheet must use the standard Excel date format and not the one generated by your computer system. It can be in either US or UK format, the system will accept either, but make sure the setting is as per the below (NOT the version with the *):
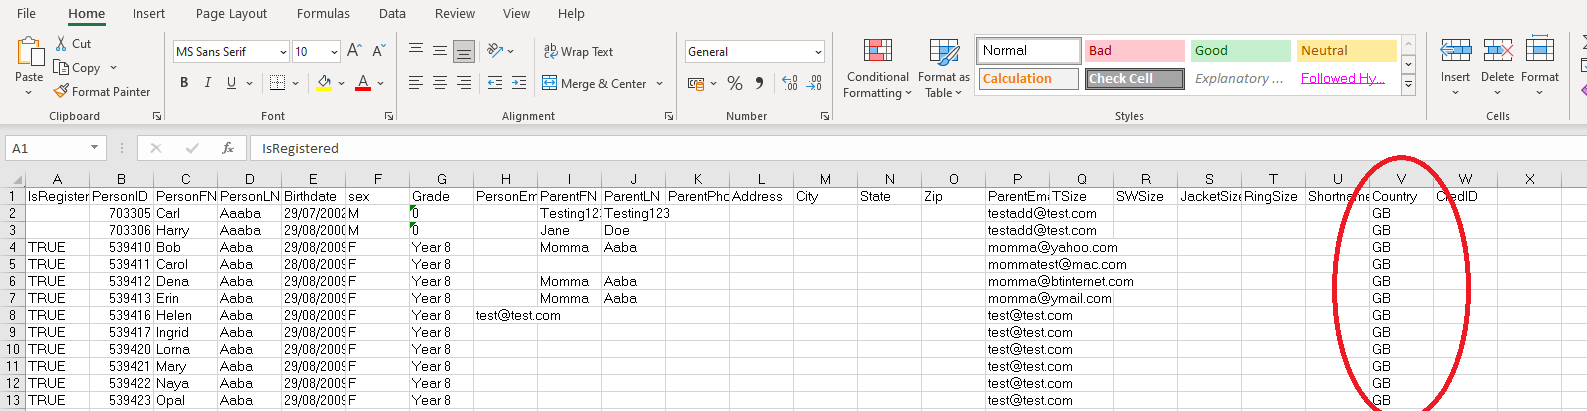
The Country field must not be blank – if it is, these records will fail to upload – and it must be in international country code format, therefore make sure every row has ‘GB’ entered (if you are a UK-based team, other countries should use their country code).
TASK 4
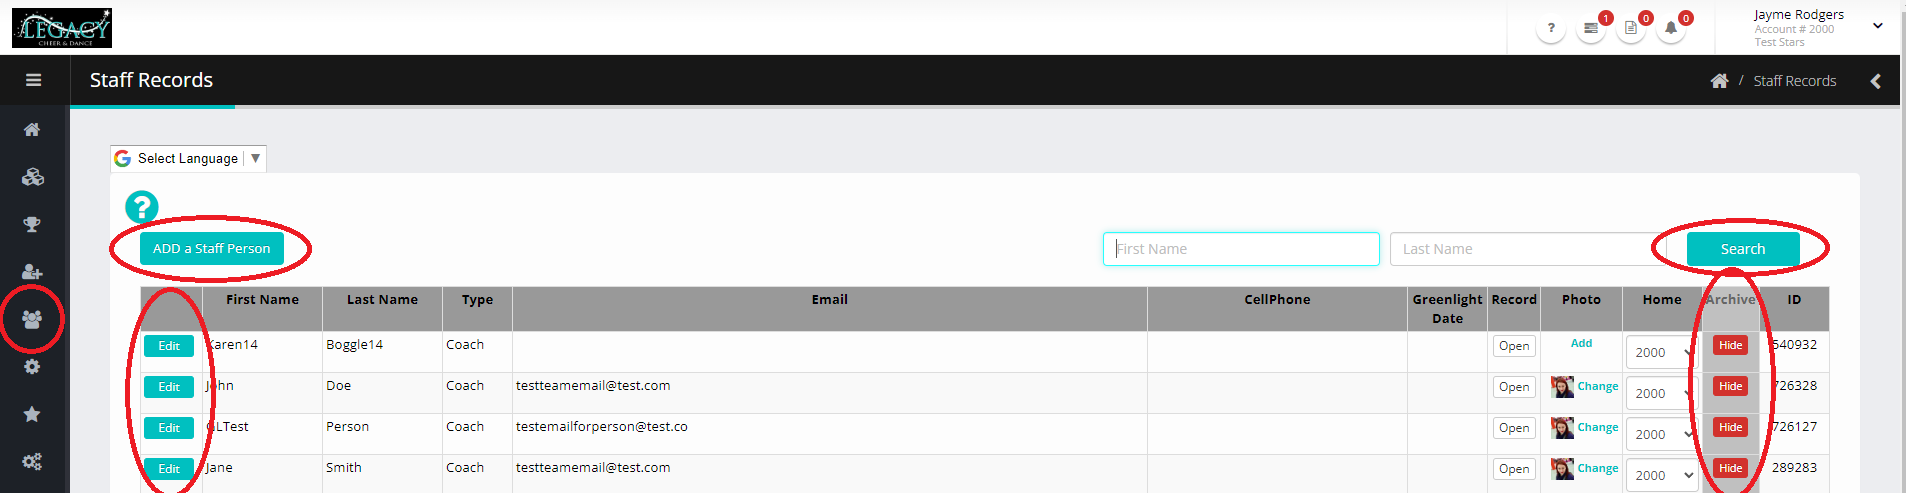
Add/Update your Coaching Staff:
Visit the ‘Staff & Others’ page. Any staff that are no longer with your Gym this season should be Hidden. As with athletes, you can find them again and Unhide them using the Search button.
Use the ‘Add a Staff Person’ button to add any new staff members you have for the season – at this stage you only need to add their First Name, Last Name, Gender and Primary Role, all other elements can be updated later. You can also ‘Edit’ any existing staff if anything needs correcting.
Don't forget that you will also need to upload a photo and a DBS certificate for each coach, for their Greenlight Verification. The deadline for this is around 1 month prior to the event - check the exact date via your Coaches Info Page.
TASK 5
Add Your Athletes & Coaches to Teams:
Any teams you had last season will no longer be in the system, so you must setup new Teams for the new season.
First you need to first create the team names that you want to add Athletes to. Go to the Teams menu and select ‘Create new Teams on RegChamp’. Do this even if you aren’t going to add the athletes via Excel.
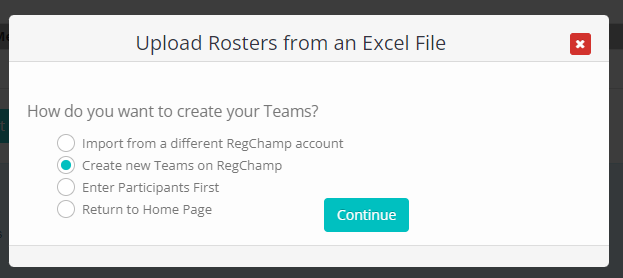
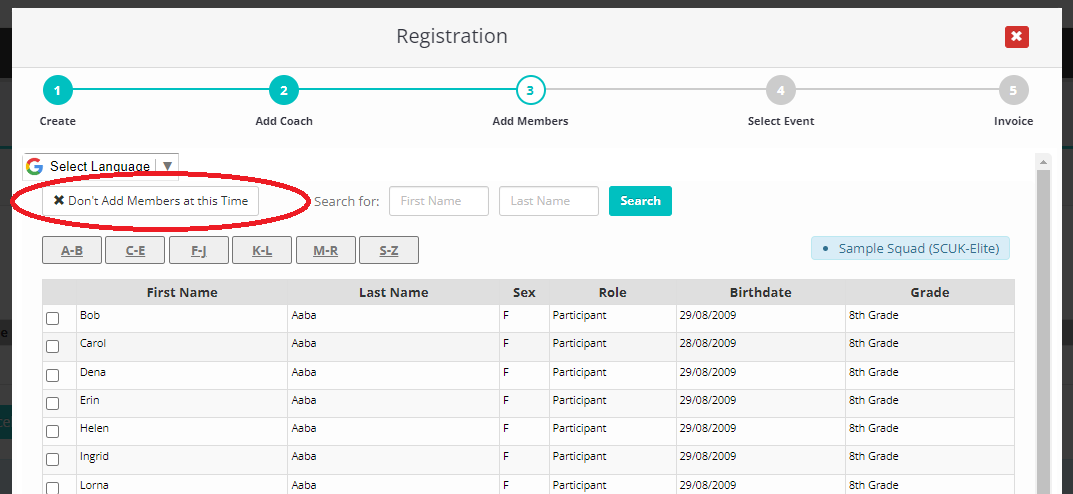
Now select ‘+Create a New Team’ and input the details – if you do plan to use Excel to add your athletes, only do steps 1 & 2 and then click ‘Don’t Add Members at this Time’ or just click X to close the window.
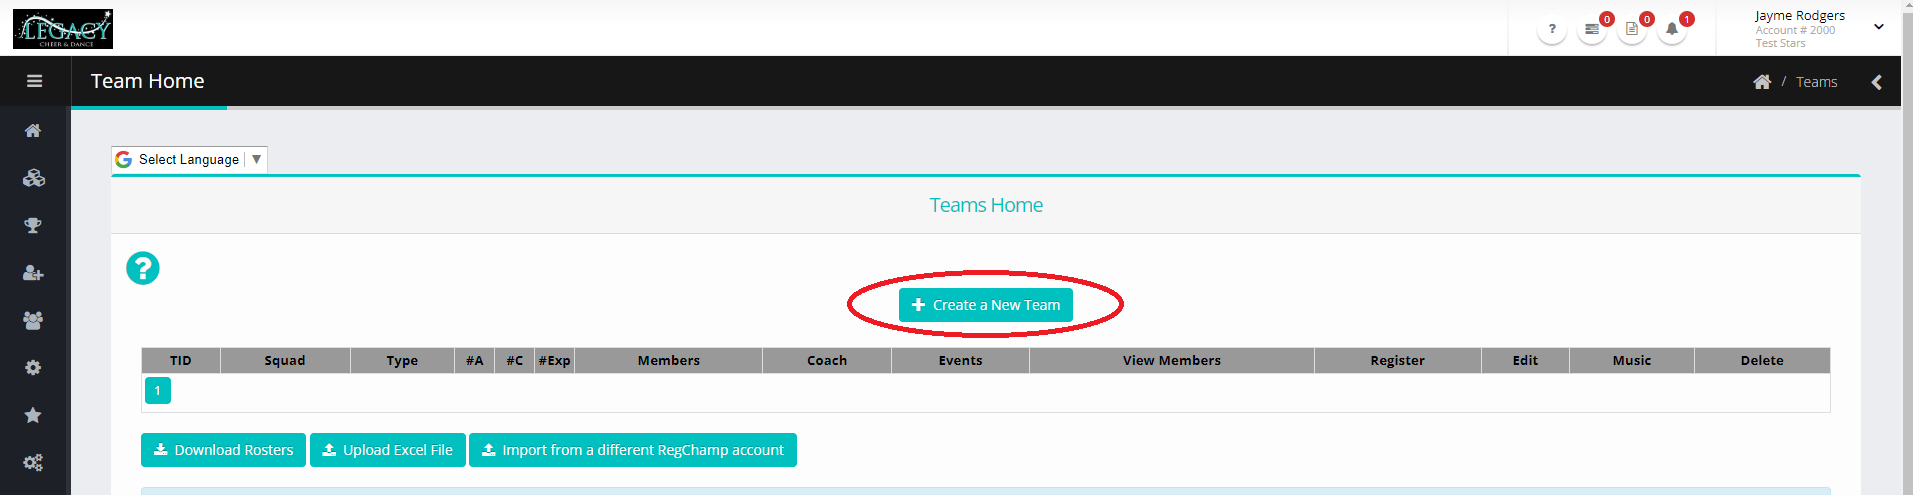
Repeat the above process for all the teams you want to add.
You can also use this process to create Stunt Groups and Partner Stunts using the ‘Small Groups & Solos’ button. However, please note that availability to enter these divisions will be subject to event capacity and they may be offered as Virtual only.
(See instructions here on how to amend the Team Name for Stunt Groups).
When you are ready to add Athletes, you can either do it Manually by clicking the +Add button next to the Team name and selecting the Athletes & Coaches via the tick boxes:
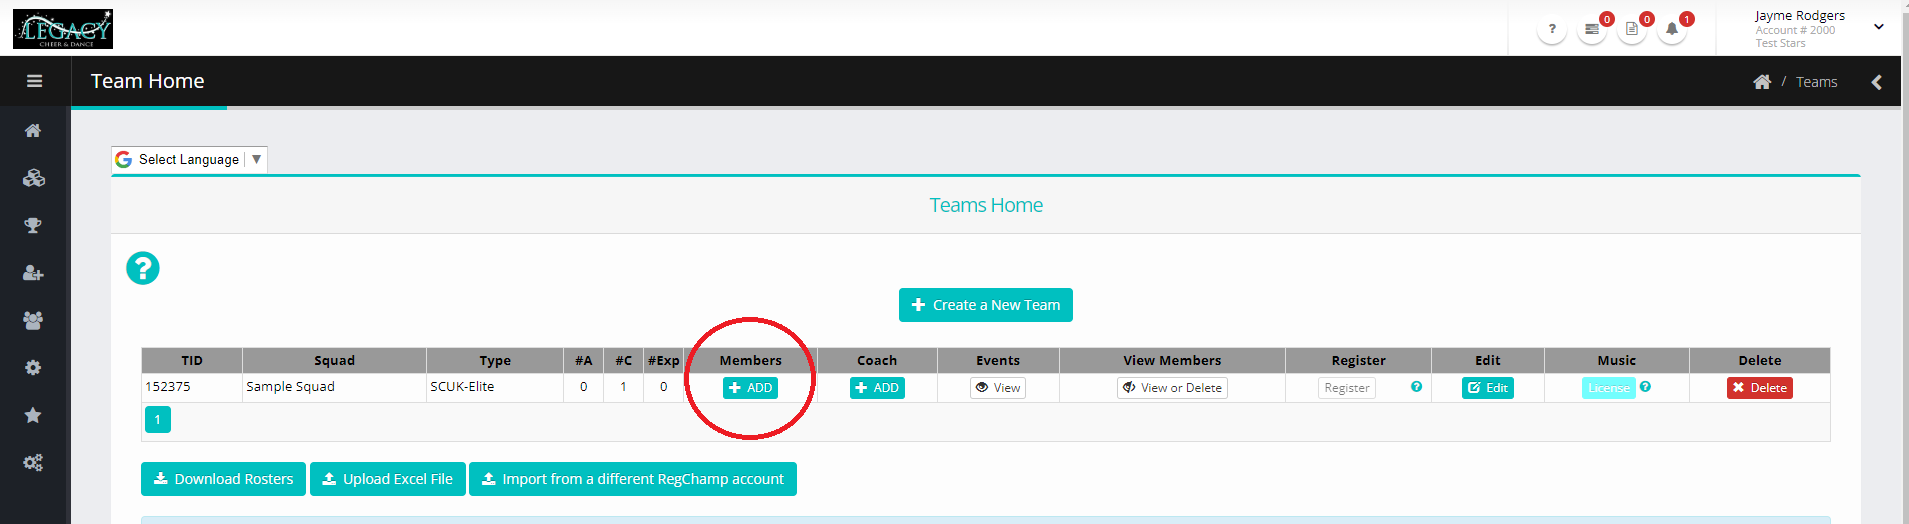
Or, via an Excel upload (note that using this version you can only add athletes, so you'll need to add the Coaches afterwards manually).
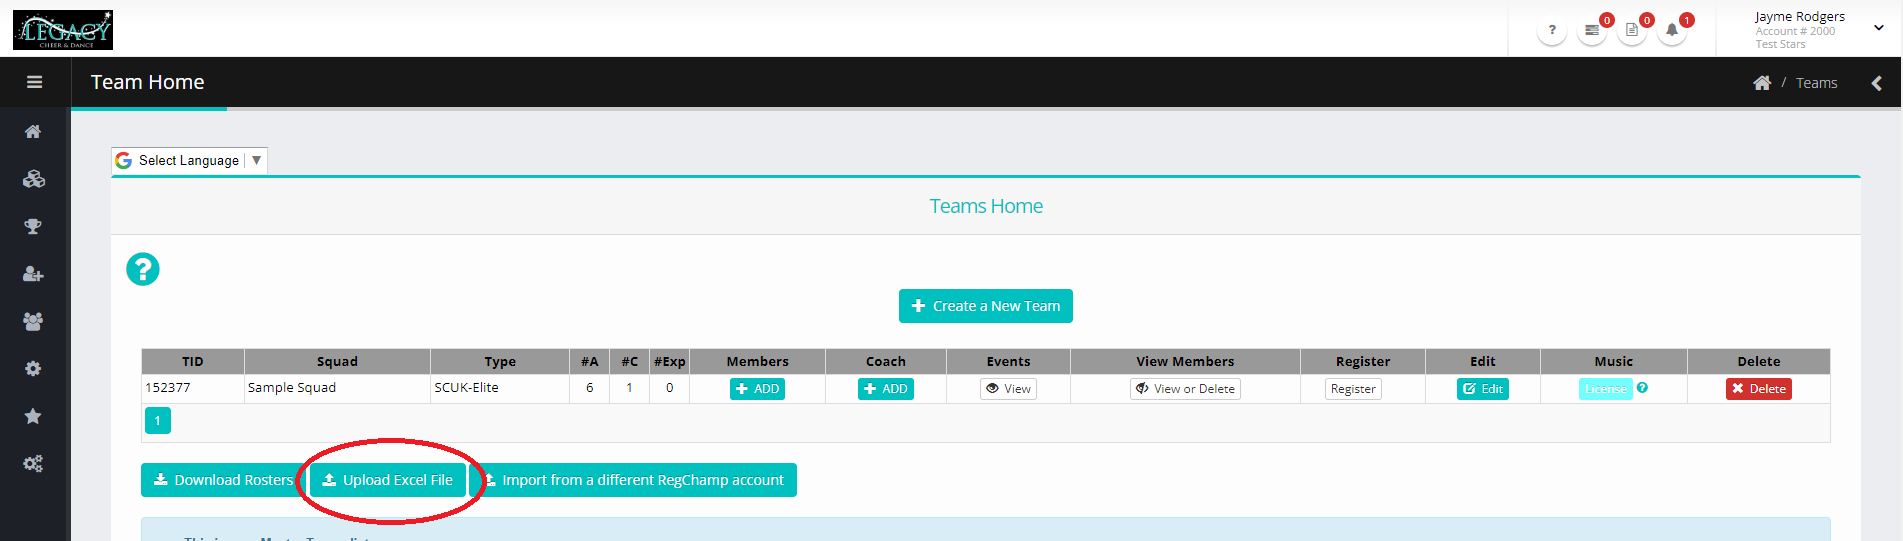
Click on the Download Rosters button to generate an Excel file with all your Athletes listed (that you set up previously):
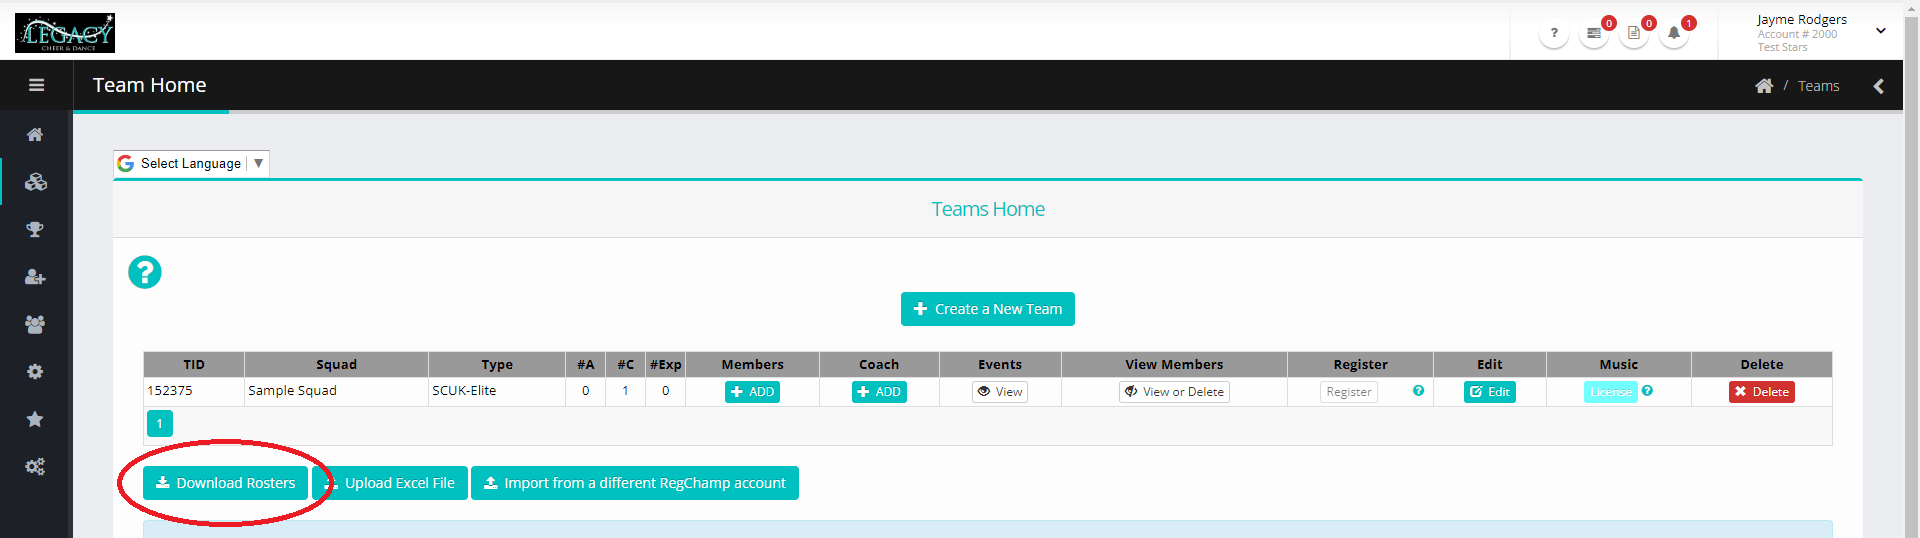
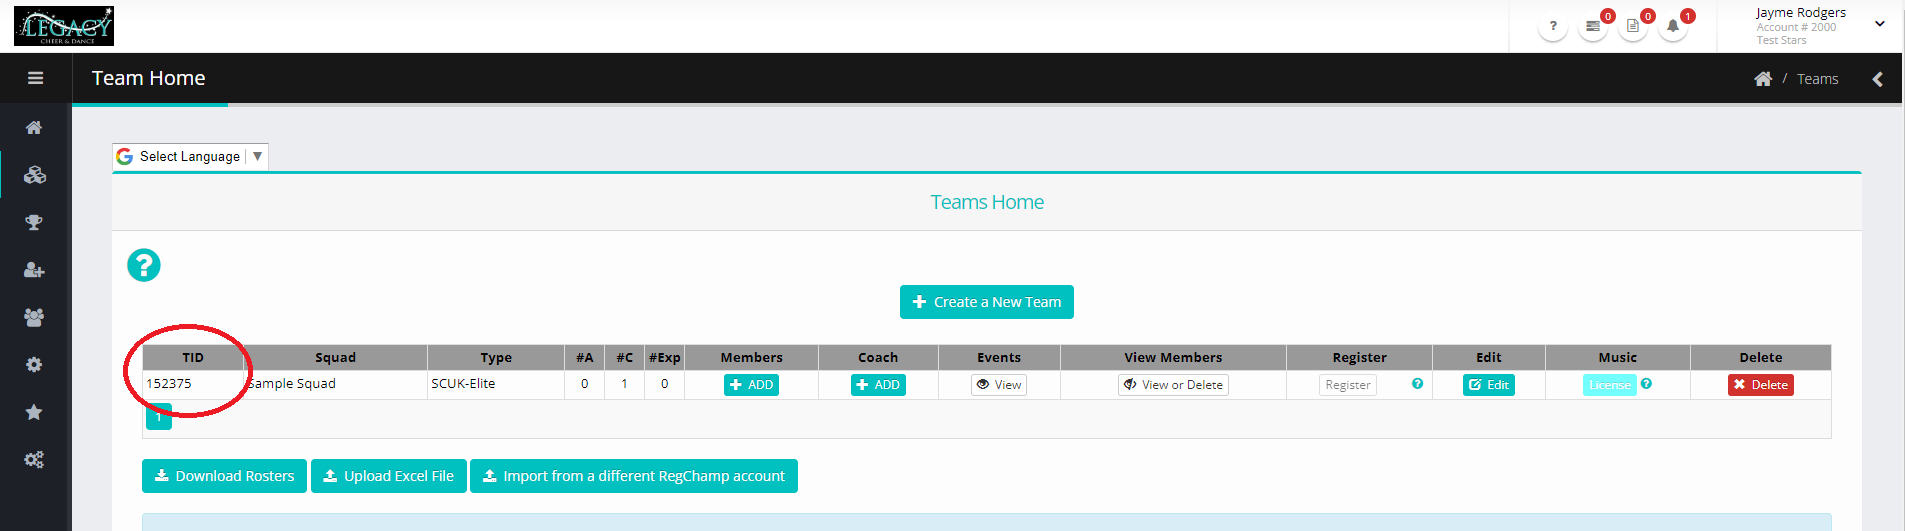
In the Excel file, in the TrackingID column, add the TID number displayed next to each team you created to the relevant athletes. Note that you should leave the SquadName column blank.
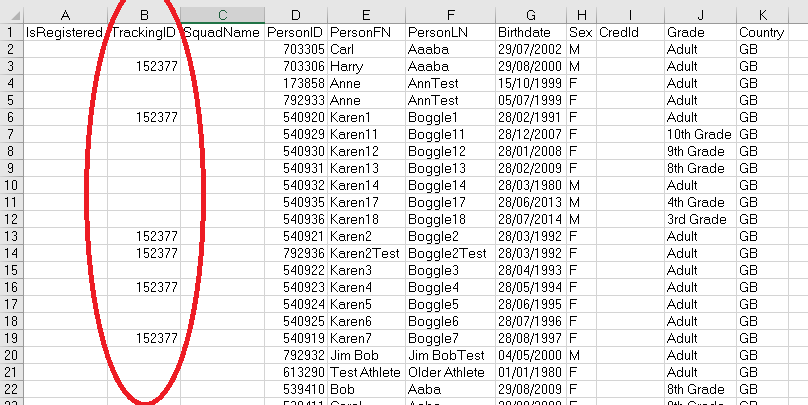
NOTE FOR CROSSOVERS The Excel file will only list each athlete one time. If they are in multiple teams, make a duplicate of the entire row and then change the Tracking ID for each team they are on. For example:

Save the data and now select Upload Excel File and follow the instructions.
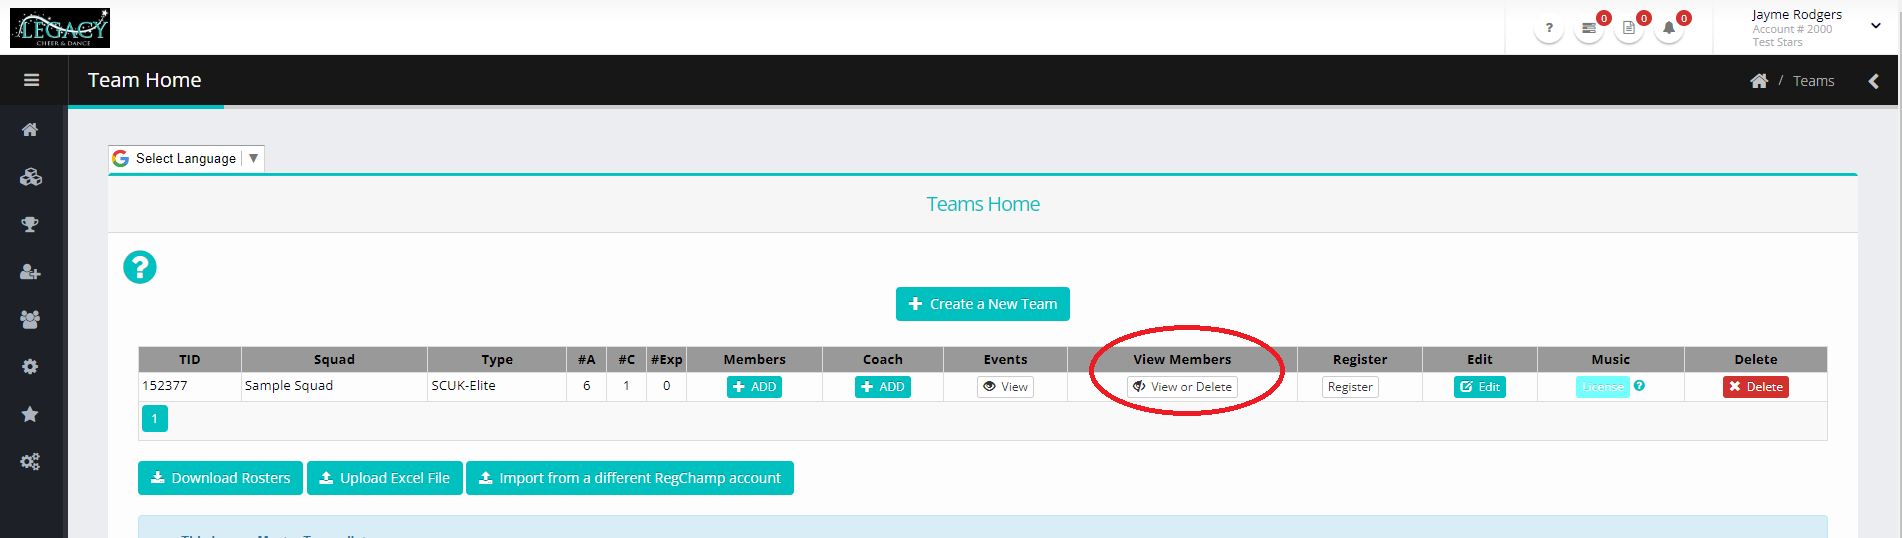
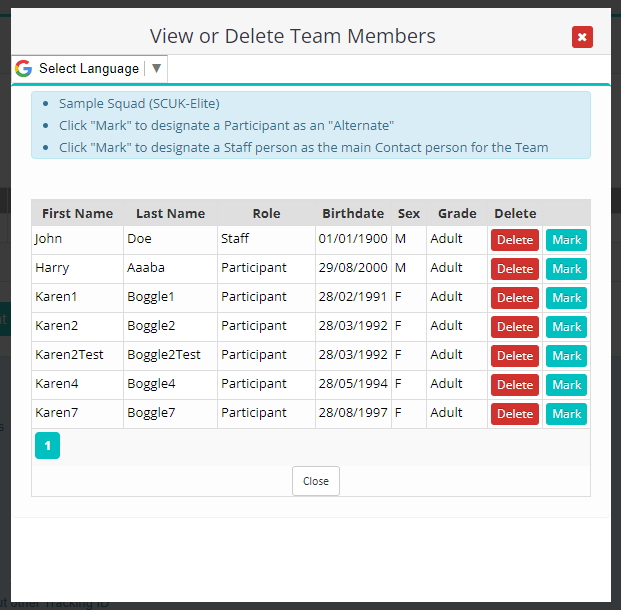
Once the upload is complete, review your teams to make sure everything is accurate. You can use the +ADD button at this time to add the Coaches for each team:
Now you are ready to enter Events for the Season!
